Log Cabin Square Project (For a finished cross-stitch square) *Cross Stitch Design shown is not by Linen Flowers
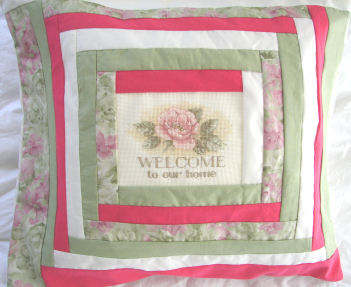
If you have a small finished cross stitch square and would like to finish it some other way besides a frame, consider a Log Cabin Pillow. These make nice wedding gifts (be sure to write for display only on the card, as well as hand washing instructions in cold water). I wanted to make my pillow cover removable, just in case it needed hand-washing, so I sewed it with a flap on the back side. Here's how to do it. Materials Needed: 1 16" pillow form 4 Cotton Fabrics that are complimentary to your finished cross stitch piece. (Enough of one to use for the back side of the pillow) A 1 1/2" wide Seminole Stripper quilt template 4 x 14" quilt template for border
1. Quilt the Log Cabin square around the cross stitch: Iron all fabrics. Begin by cutting 4 different colored strips a little longer and wider than your cross stitch piece. As your pieces get longer, you will want to fold the fabric and place the beginning of the template on your fold to cut. (Save the leftovers pieces for future Log Cabin projects). In the pillow shown above, look at the 4 pieces surrounding the finished cross stitch. You can see how the solid pink at the top of the cross stitch is sewn on first, because it has exactly the same width as the cross stitch. This piece is laid on the cross stitch, covering it, right sides facing, with edges aligned. It is sewn to the cross stitch with a 1/4" hem, then turned right side out and finger pressed. Flip piece over, place quilt ruler aligned with side of cross stitch, and trim off fabric strip even with cross stitch piece side. The next piece will be worked on the side that was just trimmed. (See the white piece on the right side of cross stitch in the photo above). This fabric strip will be laid on the cross stitch and first fabric piece, right sides facing, with edges aligned. It is sewn to the cross stitch and fabric with a 1/4" hem, then turned right side out and finger pressed. Then it is flipped over, and with the quilt ruler and rotary cutter, trim off piece even to the cross stitch bottom fabric. Next- the green solid piece below the cross stitch... This strip will be the width of the cross stitch plus the white fabric strip you have just sewn. Sew, finger-press, and trim in the same manner. Next- the green and pink floral print on the left side of the cross stitch. This one will be sewn to include the cross stitch center as well as both fabric strips on the end. Sew, finger-press, and trim in the same manner. You can see that you are working in a circle. So your next strip would be the one above the bright solid pink you started with. Keep working in this manner until 5 strips are sewn onto each side of the cross stitch. (This could be more or less to cover the pillow size, depending on the size of your xst). Remember to alternate fabric as you work the strips! Then I cut my border, using a quilt template that was 4 x 14". I cut one of each color fabric. I repeated the Log Cabin technique in the order listed. *Note: As you get further along in sewing this front piece, keep checking your size against the pillow. It would be preferable not to add more pieces than have to trim these off later. You would want a little room for the pillow to move inside the front and back pieces (at least 1 to 1/2"), but not too much. Your seam to sew the pillow together will be 1/2".
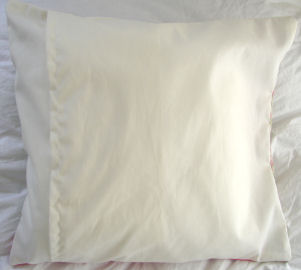
2. Cut (2) back pieces the same size as your Log Cabin Finished Front Piece: Sew a 1/2" hem on one side of each back piece, which will be the area of overlap to insert and remove pillow. With right sides facing up (hems facing down), overlap these by 4". (My project shows a overlap at the side, but these are directions to overlap in the center, which I prefer to do now). Use a ruler to check the overlap from top to bottom, and place a few pins to secure. Sew a 1/2" hem across the top and bottom to secure overlap. (Overlap will be where you can remove pillow.)
3. Sewing Log Cabin Square and Back Piece together: Place Log Cabin front piece and back piece together, right sides facing. (Center back opening below center of finished cross stitch). Pin. Sew all around pillow with a 1/2" hem. There's no need to leave an opening to turn pillow piece right side out, as you have made the back opening. Trim any long edges on the inside fabric, clip threads, and turn right side out. Insert pillow and use a pin to carefully pull out the corners of your pillow. You now have a beautiful Log Cabin pillow to give or keep!
|